
When I started blogging, the one question I wondered the most was: "How do other bloggers maintain a white feed, and how do they ensure the white is the same white across all their pictures?". Sometimes 'white' can look blue, grey, and other times just downright yellow. I've only recently started adopting this technique that allows me to keep my white consistent across my Instagram feed.

Here's the original of the above picture:

Some more before and afters:


Another one:


Also, perspective is everything:

Clearly there's a common theme here (I'm hungry):


Before I get into the details, below is the ice cream photo after basic Snapseed edits. For a step-by-step tutorial on how I edit in Snapseed, check out my previous post. I didn't desaturate the background here, which I normally would have done to get rid of the unwanted yellow tones.

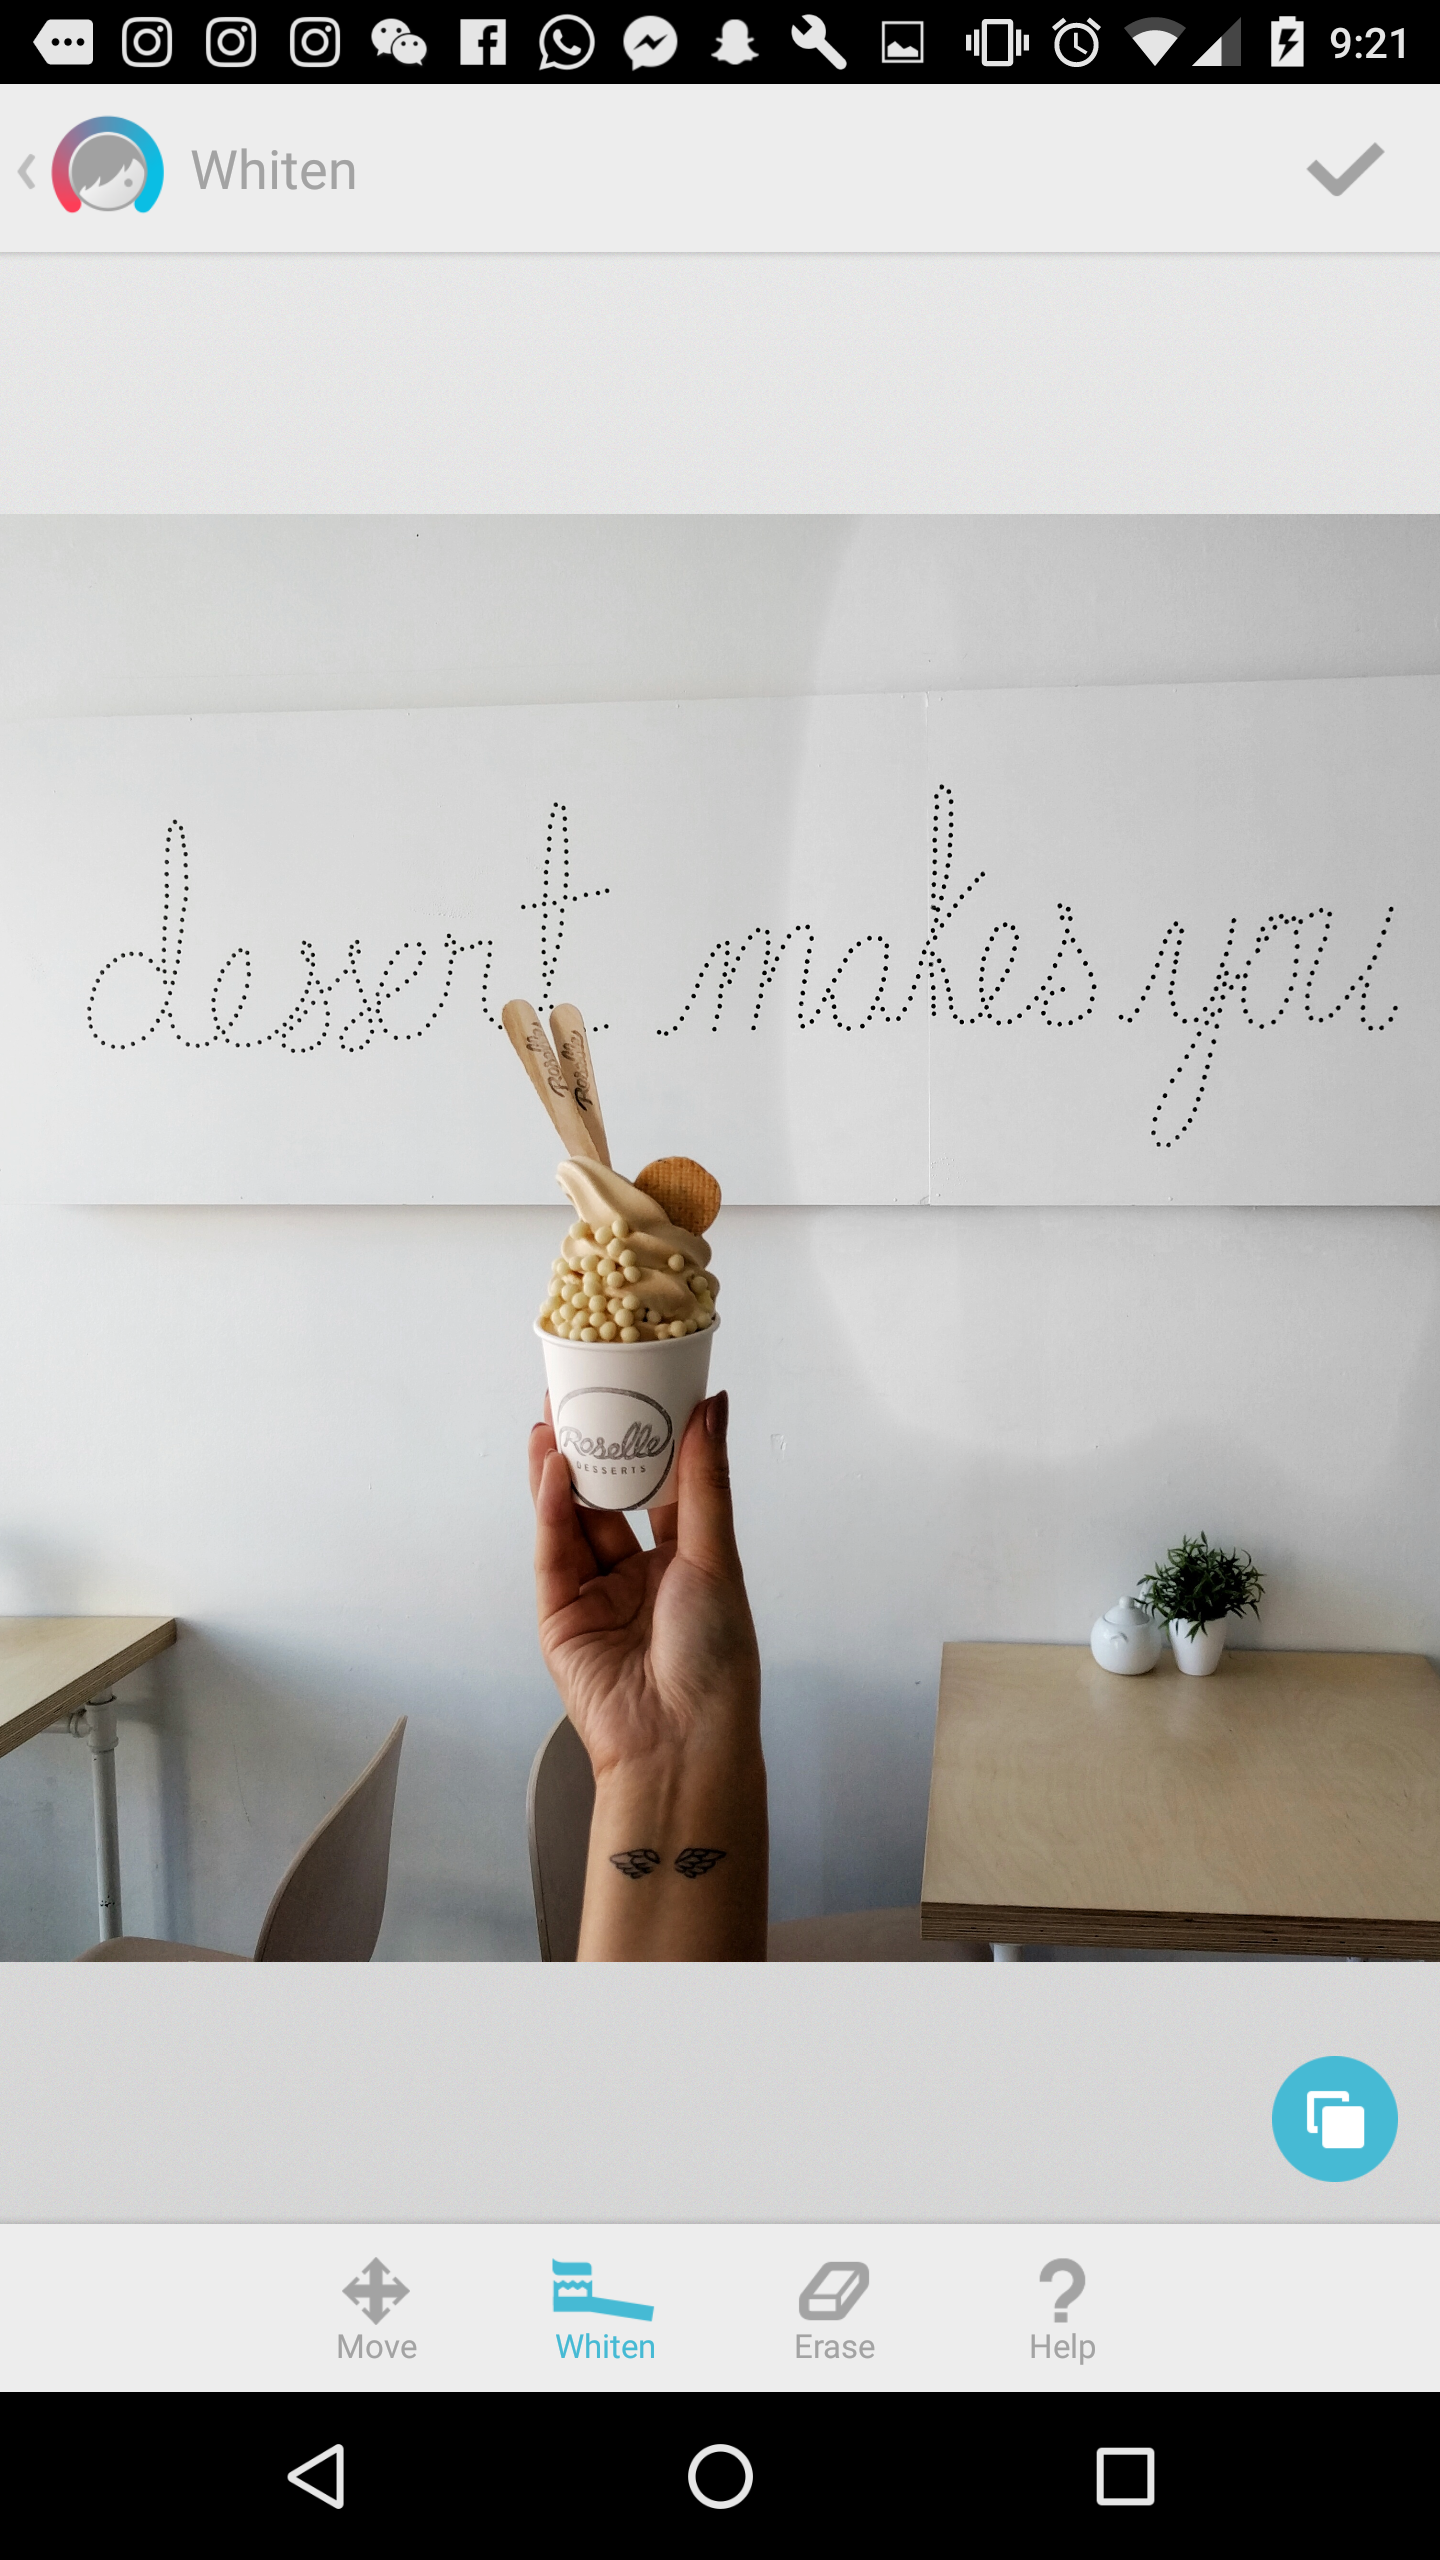
So what's the technique? Facetune! I simply use the Whiten feature to bring out the white in the photo. I zoom in to cover smaller areas, and toggle back and forth between Whiten and Erase to ensure I don't go over areas I want to maintain colour (like my hands).

And that's it! It's nothing new or innovative, and many bloggers utilize this technique to highlight the white in their photos. Simple, but effective! My editing process has changed drastically since I first started blogging, and I'm sure it'll continue to evolve. I would love to know what some of your favourite editing apps are!